Windows Multiplayer Manual
Set up Multiplayer Software
Note for Using Hardware with the Windows 10 Operating System
For a correct playback of the screens/playlists via the multiplayer, the Windows zoom factor needs to be set at 100%.
Please check the setting in the Windows display settings.
Open Display Settings
Windows → Settings → System → Display → Scale and layout → Change the size of text, apps and other items → Drop down menu.
Change Scaling
Open the menu in the Change the size of text, apps and other items box and select the 100% menu item.
Player Download
1. Log in to your Cloud Account to download the Multiplayer Software.
2. Open the drop down menu → Download in the upper bar.
3. Click on Windows Player (HTML5)
... the download of the multiplayer_setup...exe occurs...
Player Installation
1. Double-click the downloaded multiplayer_setup.exe.
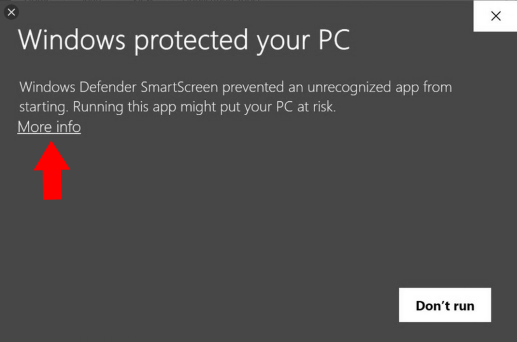
2. Click on → More info in the opened prompt.

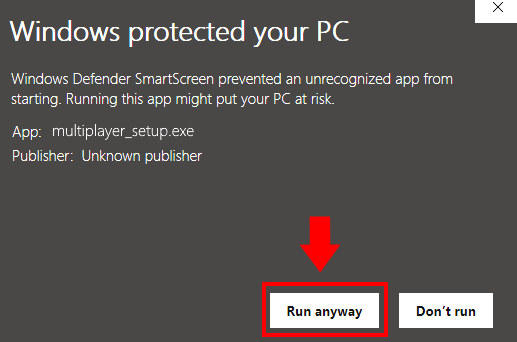
3. Click on → Run anyway.

4. Follow the installation instructions.
5. Confirm that the file is allowed to make changes on your PC.
6. Accept the terms of the license agreement.
7. Click Install.
8. Complete the installation by clicking Finish.
Activation Code
If the installation was successful, the player will start and show you an Activation Code on the screen.
See the illustrated example on the right →
Alternative
If the player does not start because you denied the option during installation, open the Multiplayer via the Windows start menu in the Multiplayer folder.
Assign Player
Log in to your account in the Cloud Software portal and access Devices Management by clicking on Devices.
There are two options to assign the player in devices management:
Option 1:
Create a new device entry by clicking on + Add Device in the lower bar.

Option 2:
Assign the new player to an existing device entry by clicking on the Pencil icon → 
in the row of the respective entry.

Option 1:
Create a New Device Entry and Assign the Player
- Click on +Add device in the lower bar of the Devices management.
- Specify a name for the device because it is a mandatory input.
- Type the Activation Code that is displayed on the screen into the field Code.
- Click on Save → this will connect the player to the device.
Option 2:
Assign the New Player to an Existing Device Entry
- Click on the pencil icon →
 of the desired device in the device management.
 - Go to the Settings window.
- Enter the Activation Code in the Code field and click on → Assign.
- Click on Save to connect the device to the new player.
Release
If you want to disconnect the device from the player, click on the Release function.
This opens the following Confirmation Prompt which you should confirm correspondingly.
...Now the device entered in the device list is disconnected from the player again and you can make another assignment...
Access Player
Start the player to display your content. Meanwhile press the key combination Ctrl + F11 (alternatively Ctrl + F1) to open a password dialog and access the player settings afterwards:
Access Player Settings
Entering the password → alpen will bring you to the settings of the player where you can see the saved URL. Furthermore you have the possibility to adjust the player’s settings and change your passwords.
Player Update
After the current version has been downloaded, you can update future player updates yourself. This allows you to determine when the update should be made.
In the Device Management of your account you will see the player version currently used next to the device entries and you can update the player to the latest version by clicking on the download icon.Note:
This procedure is necessary for a complete deinstallation of the Multiplayer software.
Deinstalling
To achieve a complete deinstallation of the application, you should have to carry out a reset beforehand → Delete local multiplayer data.
If you want to uninstall the Multiplayer software then, right click on the Windows start menu icon → ![]()
- Select the menu item App & Features
- Select Multiplayer program
- Click → Uninstall
Virtual Desktop
When the virtual desktop is activated, a second desktop overlays during the player is running. This ensures an undisturbed flow of your content and avoids the display of disturbances such as pop-ups or operating system update windows.
To activate the virtual desktop click in the device management on the pencil icon of the device and activate the virtual desktop setting. Saving the setting creates a virtual desktop.
After activating the virtual desktop, you can use the key combination Ctrl + F12 to switch back and forth between the two views. To deactivate it, uncheck the virtual desktop box and save your changes.
