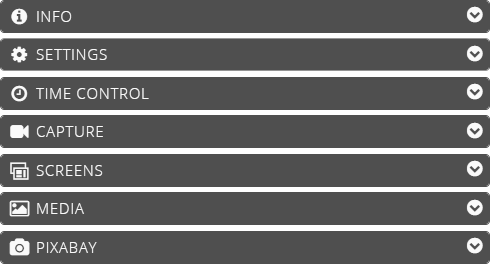
Entire Playlist Functions
Info
Clicking Info opens an information window where you can see the Name and ID of the playlist at the top.
The area below shows the time of the last modification as well as the time of the last release with date and exact time. In addition, you will see the name of the user who performed the release. If you want to check for further occurences, you can use the function created in the right corner that opens the log file.
Below that, you will get information about the playback behavior of the playlist.
In the next area, you can see the size of the playlist. This area is minimized for clarity. Clicking the plus sign will open a list with all the files downloaded by the player.
Finally you will find the area that informs you about the assignment to Devices as well as the area for displaying existing Links or an existing → Company Screensaver.
The User area is described in the following section.
Users
As an Administrator you will find also an overview of the users to whom you have given access to the selected playlist. Clicking on the Plus Symbol will open the list of these users.
Clicking on the Gear Symbol →  in the respective user line allows you to jump directly to the corresponding user configuration.
Settings
The upper field shows the current Name of the playlist. You can overwrite it and thus changed after clicking on the Edit Button
→  .
.
Below it you can add a thumbnail from the Media pool which will be displayed in the playlist line.
If you activate the Key Control option, you can set the following playback properties:
- Do not rewind
- Differentiating upper and lower case
- Transition on key event
Below that you can set the
- Scale
- Transition and the
- Rotation property.
If you click on the Plus sign in the bottom corner, the additional section Replace Screen Background opens.
Time Control → Timer
What is the Cloud Software time control → Timer of a playlist?
Using the time control → Timer you have the possibility to define the runtime/playback time of your playlist.
After accessing a playlist you will find the time control area → Timer on the right side of the playlist program window.
The playback behaviour of your player then depends on the entries you have made in this area.
The setting options at runtime of the entire playlist refer to
- the input of a time at the beginning of the playback time
- the input of a time end the playback time
- the determination of the weekdays by clicking on them
Settings Options
Here you can determine the duration of the entire playlist. Enter a time for the start of the playtime in the upper field and a time for the end of the playtime in the following field. Use the arrow keys provided after clicking in the field or make a direct entry. If you want to exclude a weekday, click on the corresponding abbreviation. How to time control an element within the playlist is described in the chapter
→ Playlist Element Functions.
Capture → Record Playlist
Here you can arrange for the playlist to be recorded during publishing.
After activating the option, the further settings in this regard are activated. You can then also activate these by clicking on the respective box.
For playing the playlist on a SoC device you have the possibility to synchronize the videos.
To accept the entries, click as usual on the Save function in the bottom bar.
Templates
Clicking on the Templates bar gives you quick access to the Cloud Software Templates section, which you can access regularly via the Screens button on the Home panel. This area provides you with a selection of templates that have already been created and are stored in a folder structure. After selecting a template, you can drag and drop it into the currently called playlist. A right click on the currently inserted element opens a context menu with the option → Edit Template. This selection allows you to make individual adjustments in the → HTML5 Editor.
My Own Templates
This area is used to store your individually edited templates. You can create your own folder structure for these individual edits and define it according to user criteria. This enables a user- and demand-oriented archiving of all your edits.
Pixabay
By clicking on the Pixabay function, you can access the international image database Pixabay.com for public domain photos, illustrations, vector graphics and videos with more than 1.4 million public domain images. Here you can search for media and insert the results into your own templates.
Mediapool
In the Mediapool you save all media that you want to insert or have inserted into a template or playlist.
Please refer to the chapter → Media for further information.


